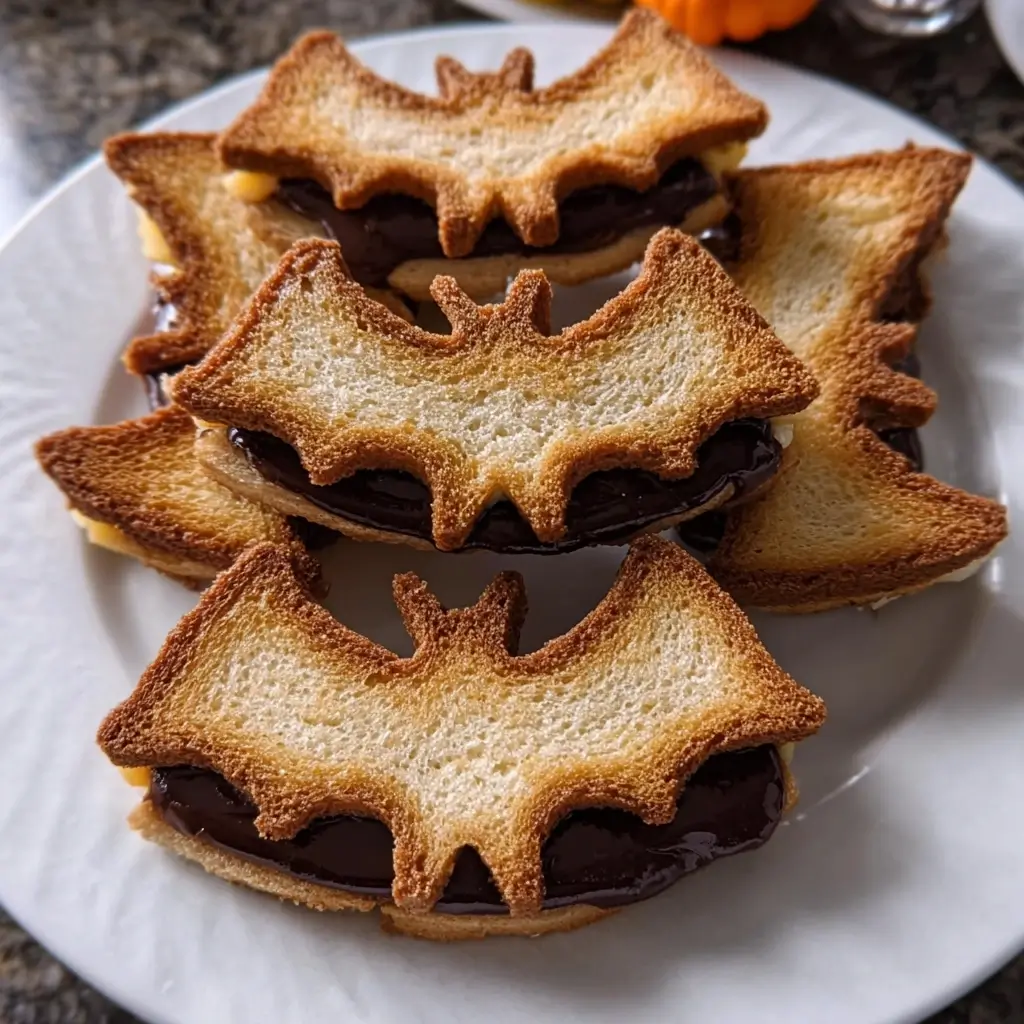
Of all the traditions our family has cultivated over the years, our annual Halloween feast has become the most anticipated. It started simply enough, a way to get some real food into the kids before the inevitable sugar rush from trick-or-treating. I remember the first year I made these Bat-Shaped Sandwich Bites. I was looking for something festive but not overly complicated, something savory to balance the sweets. The moment I brought the platter out, the room, filled with the excited chatter of little witches and superheroes, went quiet for a second before erupting into a chorus of “Whoa!” and “Bats!” They were an absolute sensation. The kids, who would normally turn their noses up at anything with visible green specks (chives, in this case), devoured them without a second thought. My youngest, dressed as a tiny vampire, held one up and pretended to make it fly before taking a giant bite. It was a picture-perfect moment. Now, years later, it’s not Halloween without them. They’ve become the centerpiece of our spooky spread, a recipe requested by friends for their own parties, and a delicious reminder that the best holiday memories are often made from the simplest, most creative ideas. They are easy to make, endlessly customizable, and guaranteed to bring a little bit of spooky, edible magic to your celebration.
Ingredients
Here is everything you will need to craft these spooktacular sandwich bites. The key is using ingredients that not only taste great together but also contribute to the visual appeal of the final product.
- 16 slices Pumpernickel or Dark Rye Bread: The dark color of this bread is essential for creating the perfect, authentic-looking bat silhouette.
- 8 ounces Cream Cheese, softened to room temperature: This forms the creamy base of our filling. Letting it soften is crucial for a smooth, lump-free spread.
- 1/2 cup Finely Chopped Cooked Deli Ham: Provides a savory, salty flavor that pairs wonderfully with the cream cheese.
- 1/2 cup Finely Shredded Cooked Roast Beef: Adds a deeper, richer meaty flavor and a pleasant texture to the filling.
- 1/4 cup Mayonnaise: Adds extra creaminess and a slight tang, helping to bind the filling together.
- 2 tablespoons Finely Chopped Chives: Lends a mild, fresh oniony flavor and adds little specks of green color.
- 1 tablespoon Dijon Mustard: Gives the filling a zesty kick that cuts through the richness of the cheese and meat.
- 1/2 teaspoon Garlic Powder: For a subtle, savory undertone that complements all the other ingredients.
- 1/4 teaspoon Black Pepper: For a touch of gentle spice.
- 32 Black Sesame Seeds or Mustard Seeds: These will be used to create the tiny, beady eyes for your bats, bringing them to life.
- 1 Bat-Shaped Cookie Cutter (approx. 3 inches wide): This is the star tool for creating the signature shape of the bites.
Instructions
Follow these step-by-step instructions for perfect bat sandwiches every time. The most important part of this process is chilling the filling, which ensures you can make clean cuts with your cookie cutter.
- Prepare the Filling: In a medium-sized mixing bowl, combine the softened cream cheese, finely chopped ham, shredded roast beef, mayonnaise, chopped chives, Dijon mustard, garlic powder, and black pepper. Use a flexible spatula or a wooden spoon to mix everything together thoroughly. Continue mixing until the ingredients are evenly distributed and the mixture is smooth and cohesive. There should be no large lumps of cream cheese.
- Chill the Filling: Cover the bowl with plastic wrap and place it in the refrigerator for at least 30 minutes, or up to an hour. This step is critical. Chilling the filling will cause it to firm up, which will prevent it from squishing out the sides of the bread when you press down with the cookie cutter. A firm filling is the secret to a clean, well-defined bat shape.
- Assemble the Sandwiches: Lay out 8 slices of the pumpernickel bread on a clean, flat work surface, like a cutting board. Once the filling has chilled, remove it from the refrigerator. Divide the chilled filling evenly among the 8 slices of bread, spreading it all the way to the edges. A small offset spatula works wonderfully for this task.
- Complete the Sandwiches: Place the remaining 8 slices of pumpernickel bread on top of the filling-covered slices to create 8 full sandwiches. Gently press down on each sandwich to ensure the top slice adheres to the filling.
- Cut Out the Bat Shapes: Now for the fun part! Take your bat-shaped cookie cutter and press it firmly down onto one of the sandwiches. It helps to press straight down and then give it a slight wiggle to ensure a clean cut through both slices of bread and the filling. Carefully push the bat-shaped bite out of the cookie cutter. If it sticks, you can use a toothpick or the end of a chopstick to gently nudge it out.
- Repeat the Cutting Process: Continue cutting out bat shapes from the remaining sandwiches. Depending on the size of your bread and your cookie cutter, you should be able to get 2 to 3 bat bites from each full sandwich. Arrange the cut-out shapes on a serving platter. Don’t discard the crusts and leftover sandwich pieces! They can be toasted to make delicious, savory croutons for a soup or salad.
- Add the Eyes: To bring your bats to life, it’s time to give them eyes. Using a pair of tweezers or just your fingertips, carefully place two black sesame seeds or mustard seeds onto the head of each bat bite. This small detail makes a huge difference in their final appearance!
- Final Chill and Serve: For the best results, cover the platter of bat-shaped sandwich bites with plastic wrap and chill them in the refrigerator for another 15-20 minutes before serving. This helps them set completely and makes them even more delicious. Serve chilled and watch them disappear!
Nutrition Facts
The nutritional information is an estimate and can vary based on the specific brands of ingredients used.
- Servings: 16-24 sandwich bites
- Calories per serving (1 bite): Approximately 75-95 kcal
- Protein: A good source of protein from the deli meats and cream cheese, essential for keeping little ghouls and goblins energized.
- Carbohydrates: Provides energy primarily from the pumpernickel bread, which often contains whole grains for more sustained power.
- Fat: The cream cheese and mayonnaise contribute to the fat content, which provides flavor and a satisfying mouthfeel.
- Sodium: The deli meats, cheese, and mustard contain sodium, which is important to be mindful of, but perfectly acceptable as part of a festive treat.
Preparation Time
This recipe is quick to assemble, with most of the time dedicated to chilling the ingredients to ensure a perfect result.
- Active Preparation Time: 20 minutes. This includes mixing the filling, assembling the sandwiches, and cutting out the shapes.
- Chilling Time: 45-60 minutes. This is crucial downtime where the refrigerator does the work, firming up the filling for easy cutting.
- Total Time: Approximately 1 hour to 1 hour 20 minutes.
How to Serve
Presentation is everything when it comes to fun holiday food! Here are a few creative ways to serve your Bat-Shaped Sandwich Bites to maximize their spooky impact.
- The Spooky Graveyard Platter:
- Arrange the bat bites on a large, dark-colored platter or a wooden board.
- Create a “graveyard” scene by scattering fresh herbs like dill or parsley around the platter to look like overgrown grass.
- Use rectangular crackers or pieces of dark bread stood upright as “tombstones.”
- Place a small bowl of blood-red dip, like marinara sauce or roasted red pepper dip, in the center and call it the “Vampire’s Well.”
- The Bat Cave Display:
- Use a multi-tiered serving stand to create a “bat cave” effect. Place the sandwiches on each level, making it look like the bats are flying at different heights.
- Drape fake, stretchy spiderwebs (sparingly) around the stand for an extra creepy touch.
- Place a few black or purple grapes around the base of the stand to look like “cave rocks.”
- A Frightfully Fun Halloween Lunchbox:
- Surprise your kids with a spooky-themed lunch. Pack a few bat sandwich bites in their lunchbox.
- To keep them from getting squished, use a bento-style box with separate compartments.
- Pair them with “Witch’s Fingers” (carrots sticks with a slivered almond “fingernail”), “Monster Eyes” (grapes or melon balls), and a small container of yogurt or applesauce.
- Elegant Appetizers for an Adult Party:
- These aren’t just for kids! For a more sophisticated Halloween gathering, arrange the bat bites neatly in rows on a sleek, modern platter.
- Garnish the platter with a sprinkle of paprika for color and a few sprigs of fresh rosemary for an elegant, woodsy aroma.
- Serve alongside other appetizers and a selection of wines. A light Pinot Noir or a crisp Sauvignon Blanc would pair beautifully.
Additional Tips
To ensure your sandwich-making adventure is a spooktacular success, here are eight additional tips to help you along the way.
- Bread Choice is Key: While pumpernickel is recommended for its dark, bat-like color, don’t be afraid to experiment. Dark whole wheat or marble rye also works beautifully. For the cleanest cuts, choose a bread that is thinly sliced and has a dense, firm texture. Very soft or airy breads can tear or squish easily.
- Don’t Skip the Chilling: We’ve mentioned it before, but it bears repeating. Chilling the filling is the most important non-ingredient step. A warm, soft filling will ooze out the sides and create a messy, undefined shape. A firm, cold filling holds its place, allowing the cookie cutter to slice through cleanly.
- Master Your Cookie Cutter Technique: For the sharpest shapes, press the cookie cutter down firmly and evenly. Once it’s all the way through, give it a little wiggle back and forth before pulling it up. This helps separate the bite from the surrounding sandwich, making it easier to remove.
- Make-Ahead Magic: You can prepare the filling up to two days in advance and store it in an airtight container in the refrigerator. This breaks up the workload, so on the day of your party, all you have to do is assemble, cut, and serve.
- Waste Not, Want Not (Use the Scraps!): You’ll be left with a lot of bread crusts and pieces of sandwich with filling. Don’t throw them away! Chop them up, toss them with a little olive oil and garlic powder, and bake them at 375°F (190°C) for 10-15 minutes for amazing homemade savory croutons. They are perfect for a “Witch’s Brew” tomato soup.
- Customize the Filling: This recipe is a fantastic template. Feel free to customize the filling based on your family’s preferences. You could swap the ham and beef for finely shredded chicken, make a classic egg salad filling, or even a vegetarian version with seasoned mashed chickpeas or a savory vegetable cream cheese spread.
- Perfecting the Bat Eyes: If you don’t have black sesame seeds, you have other options! A tiny dot of black food coloring applied with a toothpick works well. You can also use a small drop of balsamic glaze or even a tiny piece of black olive. The goal is just to create that small, dark point of contrast.
- Freezing for Future Frights: You can absolutely make these ahead and freeze them. Assemble and cut the sandwiches (without the eyes), then arrange them in a single layer on a baking sheet. Freeze until solid, then transfer them to a freezer-safe bag or container. They can be frozen for up to a month. To serve, let them thaw in the refrigerator for a few hours, then add the eyes before placing them on your platter.
FAQ Section
Here are answers to some of the most common questions about making these delightful Halloween treats.
1. Can I use a different type of bread, like gluten-free bread?
Absolutely! The key to using gluten-free bread is to find a brand with a firm, dense texture that won’t crumble easily. Some gluten-free breads made with starches can be very soft. Look for heartier varieties, perhaps with seeds or ancient grains. A great trick is to lightly toast any bread (gluten-free or regular) that feels a bit too soft before you assemble the sandwiches. This gives it more structural integrity to stand up to the cookie cutter.
2. My filling seems too runny, what did I do wrong and how can I fix it?
A runny filling is usually caused by cream cheese that was overly soft or mayonnaise that is particularly thin. But don’t worry, it’s an easy fix! The best solution is to add a bit more “bulk” and chill it longer. You can mix in an extra ounce of cream cheese, some more finely chopped meat, or even a tablespoon of plain breadcrumbs to help absorb the excess moisture. Then, give it a thorough chill in the freezer for 15-20 minutes or the refrigerator for at least an hour to help it firm up significantly.
3. What is the best way to transport these bat-shaped bites to a party?
To ensure your bats arrive in perfect condition, transport them in a single layer in a rigid, flat container with a lid, like a large Tupperware or a cake carrier. If you need to stack them, place a layer of parchment or wax paper between the layers to prevent them from sticking or smushing. Always transport them in a cooler with an ice pack to keep them chilled and food-safe.
4. Can I make this recipe vegetarian or even vegan?
Yes, this recipe is very adaptable! For a vegetarian version, simply omit the meats and create a savory veggie cream cheese filling. Finely chopped sun-dried tomatoes, roasted red peppers, artichoke hearts, and olives mixed with the cream cheese and herbs would be delicious. For a vegan version, use a vegan cream cheese alternative and a vegan mayonnaise. Fill it with the same veggie mix, or try a seasoned hummus or mashed avocado filling. Just be sure to serve avocado-based sandwiches immediately, as they can brown over time.
5. How long will the finished sandwich bites last in the refrigerator?
Once assembled, the Bat-Shaped Sandwich Bites can be stored in an airtight container in the refrigerator for up to 2 days. However, they are at their absolute best in terms of texture and freshness when served on the same day they are made. If you make them a day ahead, the bread may become slightly softer from the moisture in the filling.
6. I don’t have a bat-shaped cookie cutter. Are there any alternatives?
No bat cookie cutter? No problem! You have a few creative options. You can use other spooky-themed cutters you might have, like a ghost, cat, or pumpkin shape. If you have no cutters at all, you can use a small, sharp knife to cut simple triangles and call them “Vampire Fangs,” or cut small circles and use olive pieces to make “Spider” sandwiches. The goal is fun and festive, and any shape will be a hit!
7. Are these bat-shaped sandwiches suitable for toddlers and very young children?
Yes, they are generally great for toddlers, as the filling is soft and easy to eat. However, always be mindful of your child’s specific eating abilities. The sandwich itself is soft, but you may want to omit the sesame seed “eyes” for very young toddlers as they can be a potential choking hazard. You can simply serve them without the eyes, and they will be just as tasty.
8. What other spooky shapes can I make using this same recipe and technique?
The possibilities are endless! This filling and bread combination works for any cookie-cutter shape. For a full Halloween platter, you could create:
- Ghosts: Use a ghost-shaped cutter on white bread.
- Pumpkins: Use a pumpkin-shaped cutter on whole wheat or cheddar-flavored bread.
- Black Cats: Use a cat-shaped cutter on the same pumpernickel bread.
- Witch Hats: Use a witch hat cutter or simply cut triangles from the sandwiches.
Creating a variety of shapes makes for an even more visually stunning and exciting party platter.

Bat-Shaped Sandwich Bites
- Total Time: 1 hour 20 minutes
Ingredients
Here is everything you will need to craft these spooktacular sandwich bites. The key is using ingredients that not only taste great together but also contribute to the visual appeal of the final product.
- 16 slices Pumpernickel or Dark Rye Bread: The dark color of this bread is essential for creating the perfect, authentic-looking bat silhouette.
- 8 ounces Cream Cheese, softened to room temperature: This forms the creamy base of our filling. Letting it soften is crucial for a smooth, lump-free spread.
- 1/2 cup Finely Chopped Cooked Deli Ham: Provides a savory, salty flavor that pairs wonderfully with the cream cheese.
- 1/2 cup Finely Shredded Cooked Roast Beef: Adds a deeper, richer meaty flavor and a pleasant texture to the filling.
- 1/4 cup Mayonnaise: Adds extra creaminess and a slight tang, helping to bind the filling together.
- 2 tablespoons Finely Chopped Chives: Lends a mild, fresh oniony flavor and adds little specks of green color.
- 1 tablespoon Dijon Mustard: Gives the filling a zesty kick that cuts through the richness of the cheese and meat.
- 1/2 teaspoon Garlic Powder: For a subtle, savory undertone that complements all the other ingredients.
- 1/4 teaspoon Black Pepper: For a touch of gentle spice.
- 32 Black Sesame Seeds or Mustard Seeds: These will be used to create the tiny, beady eyes for your bats, bringing them to life.
- 1 Bat-Shaped Cookie Cutter (approx. 3 inches wide): This is the star tool for creating the signature shape of the bites.
Instructions
Follow these step-by-step instructions for perfect bat sandwiches every time. The most important part of this process is chilling the filling, which ensures you can make clean cuts with your cookie cutter.
- Prepare the Filling: In a medium-sized mixing bowl, combine the softened cream cheese, finely chopped ham, shredded roast beef, mayonnaise, chopped chives, Dijon mustard, garlic powder, and black pepper. Use a flexible spatula or a wooden spoon to mix everything together thoroughly. Continue mixing until the ingredients are evenly distributed and the mixture is smooth and cohesive. There should be no large lumps of cream cheese.
- Chill the Filling: Cover the bowl with plastic wrap and place it in the refrigerator for at least 30 minutes, or up to an hour. This step is critical. Chilling the filling will cause it to firm up, which will prevent it from squishing out the sides of the bread when you press down with the cookie cutter. A firm filling is the secret to a clean, well-defined bat shape.
- Assemble the Sandwiches: Lay out 8 slices of the pumpernickel bread on a clean, flat work surface, like a cutting board. Once the filling has chilled, remove it from the refrigerator. Divide the chilled filling evenly among the 8 slices of bread, spreading it all the way to the edges. A small offset spatula works wonderfully for this task.
- Complete the Sandwiches: Place the remaining 8 slices of pumpernickel bread on top of the filling-covered slices to create 8 full sandwiches. Gently press down on each sandwich to ensure the top slice adheres to the filling.
- Cut Out the Bat Shapes: Now for the fun part! Take your bat-shaped cookie cutter and press it firmly down onto one of the sandwiches. It helps to press straight down and then give it a slight wiggle to ensure a clean cut through both slices of bread and the filling. Carefully push the bat-shaped bite out of the cookie cutter. If it sticks, you can use a toothpick or the end of a chopstick to gently nudge it out.
- Repeat the Cutting Process: Continue cutting out bat shapes from the remaining sandwiches. Depending on the size of your bread and your cookie cutter, you should be able to get 2 to 3 bat bites from each full sandwich. Arrange the cut-out shapes on a serving platter. Don’t discard the crusts and leftover sandwich pieces! They can be toasted to make delicious, savory croutons for a soup or salad.
- Add the Eyes: To bring your bats to life, it’s time to give them eyes. Using a pair of tweezers or just your fingertips, carefully place two black sesame seeds or mustard seeds onto the head of each bat bite. This small detail makes a huge difference in their final appearance!
- Final Chill and Serve: For the best results, cover the platter of bat-shaped sandwich bites with plastic wrap and chill them in the refrigerator for another 15-20 minutes before serving. This helps them set completely and makes them even more delicious. Serve chilled and watch them disappear!
- Prep Time: 20 minutes
- Cook Time: 60 minutes
Nutrition
- Serving Size: one normal portion
- Calories: 95


