This recipe has become an absolute lifesaver in my household. I remember the first time I whipped it up; it was one of those chaotic weekday evenings. I needed a quick appetizer before dinner, something healthy but also exciting enough to tide over a hungry family. I had a bag of frozen edamame languishing in the freezer, and a head of garlic on the counter. Ten minutes later, the aroma of sautéed garlic and savory soy sauce filled the kitchen, and my kids, who can be notoriously picky, were actually clamoring for more of these “green bean snacks!” My partner, who appreciates anything that’s both delicious and doesn’t require hours in the kitchen, gave it two thumbs up. It was an instant hit, not just for its incredible taste but for its sheer simplicity and speed. Since then, this 10-Minute Garlic Edamame has become a staple – perfect for a quick after-school snack, a sophisticated yet effortless appetizer for guests, or even a light side dish. The satisfying pop of the beans, combined with the rich, umami-packed garlic sauce, is truly addictive. It’s proof that you don’t need a lot of time or complicated ingredients to create something genuinely delicious and memorable. This recipe isn’t just food; it’s a little burst of joy that can turn any ordinary moment into something a bit more special.
Ingredients
- 1 pound (about 450g) frozen edamame in pods: The star of the show, these young soybeans offer a delightful pop and nutty flavor. Ensure they are “steam-in-bag” or suitable for quick cooking.
- 2 tablespoons olive oil or sesame oil: Olive oil provides a neutral base, while sesame oil (especially toasted) adds a distinct nutty, Asian-inspired aroma. A combination can also be used.
- 4-6 cloves garlic, minced: The flavor powerhouse! Adjust the quantity based on your love for garlic; more for a spicier kick, less for a milder touch. Freshly minced is always best.
- 1 tablespoon soy sauce (or tamari for gluten-free): Adds a deep, savory, umami flavor that is crucial to the dish. Tamari is a great gluten-free alternative.
- 1 teaspoon rice vinegar (optional): A splash of acidity to brighten the flavors and balance the richness.
- 1/2 teaspoon red pepper flakes (optional): For those who like a bit of heat. Adjust to your preferred spice level.
- Coarse sea salt or flaky salt, to taste (for finishing): Enhances all the flavors and adds a pleasant textural crunch.
- Toasted sesame seeds (optional, for garnish): Adds a lovely visual appeal and an extra layer of nutty flavor and texture.
Instructions
- Cook the Edamame: Prepare the frozen edamame according to the package instructions. This usually involves microwaving them in their steamable bag for 3-5 minutes, or boiling/steaming them for a similar duration until tender-crisp. Once cooked, drain any excess water if boiled.
- Prepare the Garlic Sauce Base: While the edamame is cooking, heat the olive oil (or sesame oil, or a combination) in a large skillet or wok over medium heat. Once the oil is shimmering, add the minced garlic.
- Sauté the Garlic: Cook the garlic, stirring frequently, for about 1-2 minutes until it becomes fragrant and lightly golden. Be very careful not to burn the garlic, as it will turn bitter. If using red pepper flakes, you can add them now along with the garlic to bloom their flavor in the oil.
- Combine and Sauté: Add the cooked and drained edamame pods to the skillet with the garlic. Toss well to coat the pods with the garlic-infused oil.
- Add Flavor Enhancers: Pour the soy sauce (or tamari) and rice vinegar (if using) over the edamame. Continue to toss and stir for another 2-3 minutes, allowing the sauce to slightly reduce and coat the edamame pods evenly. The goal is for the edamame to absorb the flavors beautifully.
- Taste and Adjust: Give one pod a taste (carefully, it will be hot!). Adjust seasoning if necessary – you might want a tiny bit more soy sauce for saltiness or a pinch more red pepper flakes for heat.
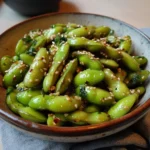
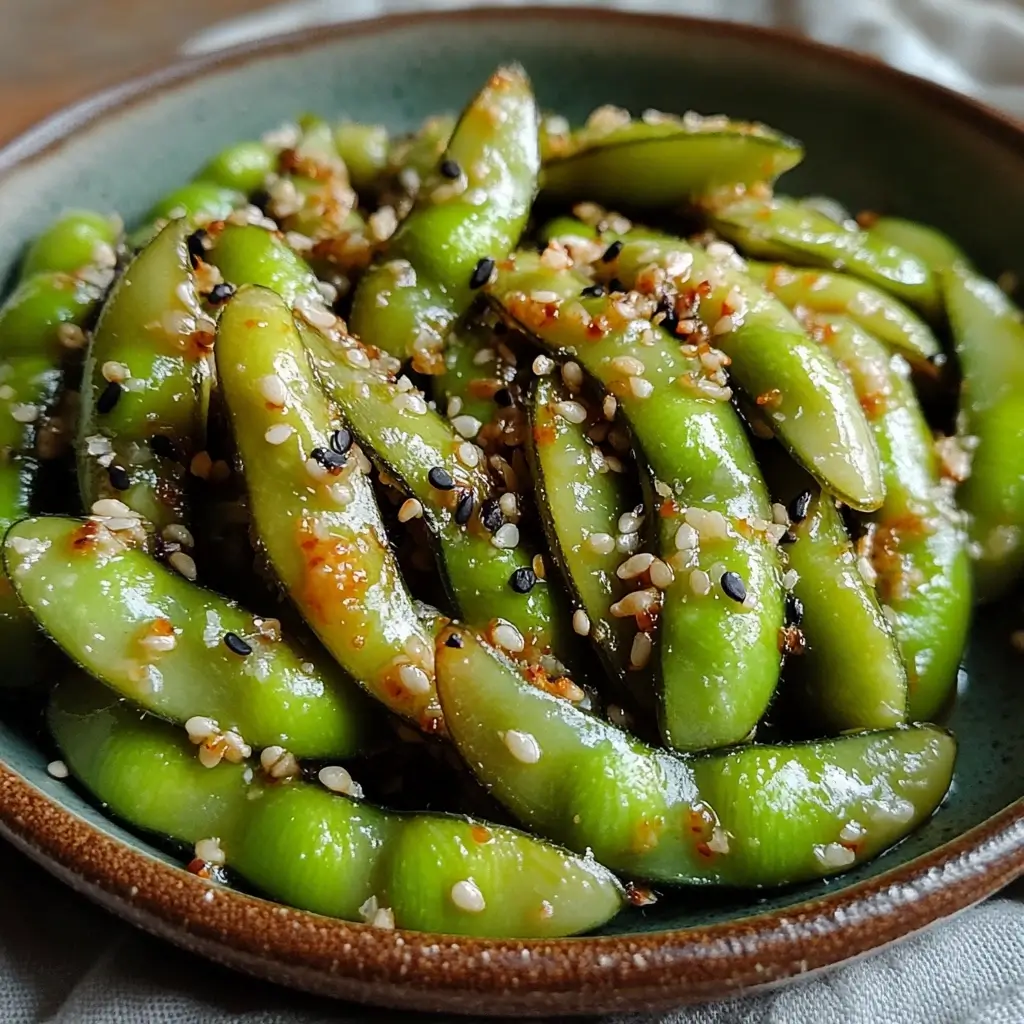
- Serve Immediately: Transfer the garlic edamame to a serving bowl. Sprinkle generously with coarse sea salt or flaky salt and toasted sesame seeds (if using). Serve warm and enjoy the delightful process of popping the beans from their savory pods!
Nutrition Facts
- Servings: Approximately 4 servings as an appetizer or snack.
- Calories per serving: Approximately 180-220 calories (this can vary based on the exact amount of oil and specific brands of ingredients used).
- Protein: Rich in plant-based protein (around 15-18g per serving), essential for muscle repair and satiety. Edamame is a complete protein, meaning it contains all nine essential amino acids.
- Fiber: High in dietary fiber (around 7-9g per serving), which aids in digestion, helps regulate blood sugar levels, and promotes a feeling of fullness.
- Healthy Fats: Contains beneficial monounsaturated and polyunsaturated fats, especially if using olive oil or sesame oil, contributing to heart health.
- Vitamins and Minerals: A good source of iron, calcium, vitamin K, and folate, contributing to overall health and well-being.
- Low in Saturated Fat: Especially when prepared with minimal oil, making it a heart-healthy choice compared to many other savory snacks.
Preparation Time
This 10-Minute Garlic Edamame lives up to its name!
- Active Preparation Time: Approximately 5 minutes. This includes mincing the garlic and measuring out the sauce ingredients.
- Cooking Time: Approximately 5-7 minutes. This covers cooking the edamame and then sautéing it with the garlic and sauce.
- Total Time: Realistically, from freezer to table, you’re looking at about 10-12 minutes, making it an incredibly efficient and rewarding recipe for busy schedules or impromptu cravings.
How to Serve
This versatile 10-Minute Garlic Edamame can be served in a multitude of ways, making it a go-to for various occasions:
- As a Standalone Appetizer:
- Serve warm in a communal bowl, allowing everyone to grab and enjoy.
- Provide a small side dish for the empty pods, keeping things tidy.
- Perfect before an Asian-inspired meal (like sushi, teriyaki chicken, or stir-fries) or any dinner where you want a light, flavorful starter.
- Healthy Snack Attack:
- A fantastic afternoon pick-me-up that’s both satisfying and nutritious.
- Great for staving off hunger between meals without resorting to less healthy options.
- Kid-friendly! The interactive element of popping the beans from the pods can be fun for children.
- Party Food Favorite:
- Easily scalable – just double or triple the recipe for larger gatherings.
- Serve alongside other finger foods and dips.
- Its vibrant green color adds a beautiful touch to any party spread.
- Side Dish Sensation:
- Pair it with grilled fish, chicken, or tofu for a complete meal.
- A wonderful accompaniment to rice bowls or noodle dishes, adding texture and a burst of flavor.
- Complements other vegetable dishes for a well-rounded vegetarian or vegan meal.
- Movie Night or Game Day Munchies:
- A healthier alternative to chips or popcorn.
- The savory, garlicky flavor is incredibly moreish and perfect for casual munching.
- Presentation Pointers:
- Use a stylish ceramic bowl for an elevated look.
- Garnish generously with flaky sea salt and toasted sesame seeds for visual appeal and added texture.
- A small sprinkle of finely chopped chives or scallions can add an extra pop of color and fresh oniony flavor.
- Consider serving with a small dish of extra soy sauce or chili oil for those who like to customize their spice and salt levels.
No matter how you choose to serve it, this garlic edamame is bound to be a crowd-pleaser!
Additional Tips
To elevate your 10-Minute Garlic Edamame experience and tailor it perfectly to your taste, consider these additional tips:
- Fresh vs. Frozen Edamame: While this recipe is designed for the convenience of frozen edamame (which is flash-frozen at peak freshness), you can use fresh edamame if it’s available. You’ll need to boil or steam fresh pods for a bit longer, typically 5-7 minutes, until tender.
- Mastering the Garlic: For a milder garlic flavor, you can use whole, lightly smashed garlic cloves and remove them before serving, or roast the garlic beforehand for a sweeter, mellower taste. For a super intense kick, add a pinch of garlic powder along with the fresh minced garlic. Always sauté garlic over medium-low to medium heat to prevent burning, which makes it bitter.
- Spice It Up (or Down): Red pepper flakes are just one option. Consider adding a drizzle of sriracha or gochujang (Korean chili paste) to the sauce for a different kind of heat and complexity. A few dashes of your favorite chili garlic sauce would also work wonders. If you prefer no heat, simply omit the chili flakes.
- Oil Choices Matter: Toasted sesame oil lends an authentic Asian aroma and flavor. However, if you don’t have it, a good quality olive oil, avocado oil, or even a neutral grapeseed oil will work. For an extra layer of richness, a tiny knob of butter (if not vegan) melted in with the oil can be delicious.
- A Touch of Sweetness: To balance the savory and salty notes, especially if your soy sauce is particularly strong, consider adding a tiny pinch of sugar or a half-teaspoon of mirin (sweet Japanese rice wine) to the sauce. This can round out the flavors beautifully.
- Achieving the Perfect Texture: If you prefer your edamame pods with a slight char, you can increase the heat slightly when you add the edamame to the pan, tossing them for a minute or two until they get a few blistered spots before adding the sauce. Ensure they are well-drained to achieve this.
- Get Creative with Garnishes: Beyond sesame seeds and flaky salt, try a sprinkle of furikake (a Japanese seaweed and sesame seed seasoning), finely chopped fresh cilantro or parsley for a different herbaceous note, or even a squeeze of fresh lime or lemon juice right before serving for an extra zesty kick.
- Don’t Discard the Pods (Compost!): While the pods aren’t typically eaten, they are great for composting! If you’re enjoying these outdoors, make sure to dispose of the pods responsibly. Or, if you’re feeling adventurous, some people do enjoy chewing on the well-sauced pods to extract every last bit of flavor, though they are very fibrous.
FAQ Section
Here are some frequently asked questions about making and enjoying 10-Minute Garlic Edamame:
- Q: Can I use shelled edamame (mukimame) for this recipe?
A: Absolutely! If using shelled edamame, the cooking time for the beans themselves might be slightly shorter (check package instructions). You’ll also want to reduce the sauce ingredients slightly, as there’s less surface area to coat. The flavor will still be fantastic, though you’ll miss out on the fun of popping them from the pods. - Q: Is this recipe vegan and gluten-free?
A: This recipe is inherently vegan if you use plant-based oils like olive or sesame oil. To make it gluten-free, ensure you use tamari (which is typically gluten-free soy sauce) or coconut aminos instead of regular soy sauce, as standard soy sauce often contains wheat. Always check labels. - Q: How do I store leftovers, and how long will they last?
A: Store any leftover garlic edamame in an airtight container in the refrigerator. They are best enjoyed within 2-3 days. You can eat them cold, or gently reheat them in the microwave or in a skillet over low heat. - Q: Can I make this dish ahead of time?
A: While it’s best served fresh and warm for optimal flavor and texture, you can certainly cook the edamame ahead of time and store it in the fridge. Then, when ready to serve, just make the garlic sauce and toss the cooked edamame in the skillet as per the recipe. This cuts down the prep-to-serve time even further. - Q: What if I don’t have soy sauce? Are there substitutes?
A: Yes, if you don’t have soy sauce, tamari is the closest substitute and is gluten-free. Coconut aminos are another good option, offering a slightly sweeter, soy-free, and gluten-free alternative. Liquid aminos can also work. You might need to adjust the saltiness depending on your chosen substitute. - Q: My garlic burned! What did I do wrong?
A: Burned garlic is a common mishap and usually happens if the heat is too high or if the garlic isn’t stirred enough. Minced garlic cooks very quickly. Always sauté garlic over medium-low or medium heat, and stir it constantly until it’s fragrant and just lightly golden. If it burns, it’s best to discard it and start over, as burnt garlic imparts a bitter taste to the whole dish. - Q: Can I use garlic powder instead of fresh garlic?
A: Freshly minced garlic provides the best, most aromatic flavor for this recipe. However, in a pinch, you can substitute with garlic powder. A general rule of thumb is about 1/4 to 1/2 teaspoon of garlic powder for every clove of fresh garlic. Add it to the oil and let it bloom for about 30 seconds before adding the edamame. - Q: Is edamame healthy? What are its benefits?
A: Yes, edamame is incredibly healthy! It’s a fantastic source of plant-based protein, dietary fiber, antioxidants, and essential vitamins and minerals like folate, vitamin K, iron, and manganese. It’s relatively low in calories and can support heart health, aid digestion, and help with weight management due to its satiating properties.